

In this post, we will learn to use Decision Mentor mobile app to make a simple decision. How to spend my Sunday Afternoon? Let’s look at the decision process step by step.
Getting Started
For this sample decision problem, we start by identifying our choices. What options does one have in the present scenario?
Choices
- Work on side projects
- Rest and watch Netflix
- Visit Friends
So, the main decision problem now is to choose which activity to do out of these three.
In order to make the best decision in this scenario, one can consider few things.
Criteria
- Productive Day
- Restful Day
- Enjoyable Day
Out of these criteria, which are of highest concern to us? Do we want our day to be more productive or more restful? Or a mix of these?
Now that we have identified both the choices and criteria, we can start making use of Decision Mentor mobile app to get help for making the best decision.
Starting A New Decision In Decision Mentor
From the main Dashboard screen, one can start making a new decision by pressing the “New Decision” button.

In the New Decision screen, type your Decision Objective which is “How To Spend My Sunday Afternoon?”. The description field is optional.
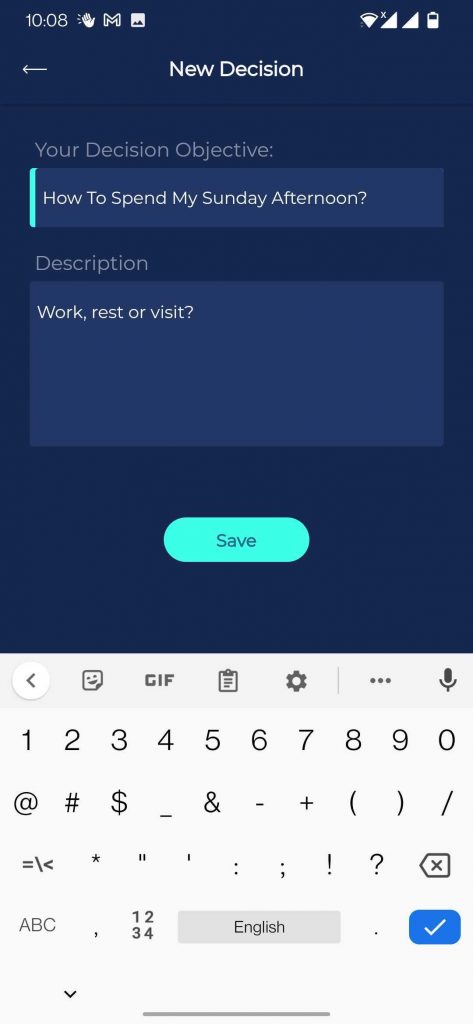
Once you save this new decision, you will see another screen from where you can enter your Choices and Criteria for this decision.
Add Choices and Criteria
As we have already identified our choices and criteria, we can simply add them here using the “+Choice” and “+Criteria” buttons. One can navigate to Criteria tab or Choice tab by tapping on the tab buttons.

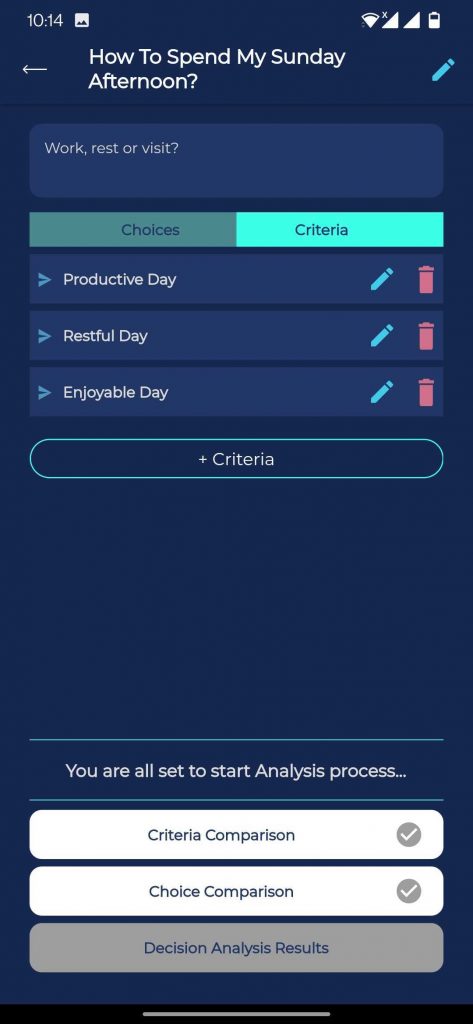
Once you have added the choices and criteria, you can move onto making Criteria Comparison and Choice Comparison.
Pair-wise Comparison of Criteria and Choices
A pair-wise comparison is basically comparing two items at a time.
Criteria Comparison
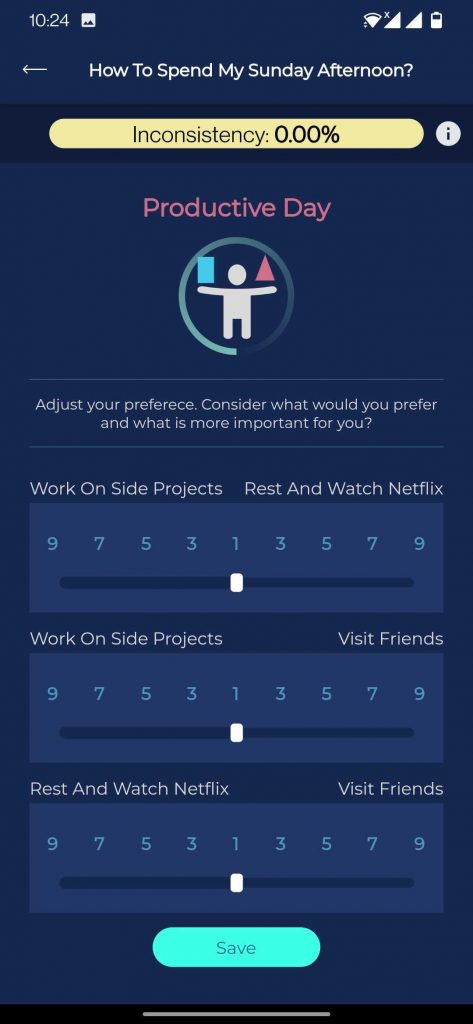
From the buttons available in the footer, press “Criteria Comparison” button to perform pair-wise comparison. In this step, we compare the available criteria based on which one is more important to us.

The Inconsistency Index on this screen is a useful metric which tells us how much consistent are our comparisons.
Once you are satisfied with pair-wise comparisons, you can save it and start Choice Comparison.
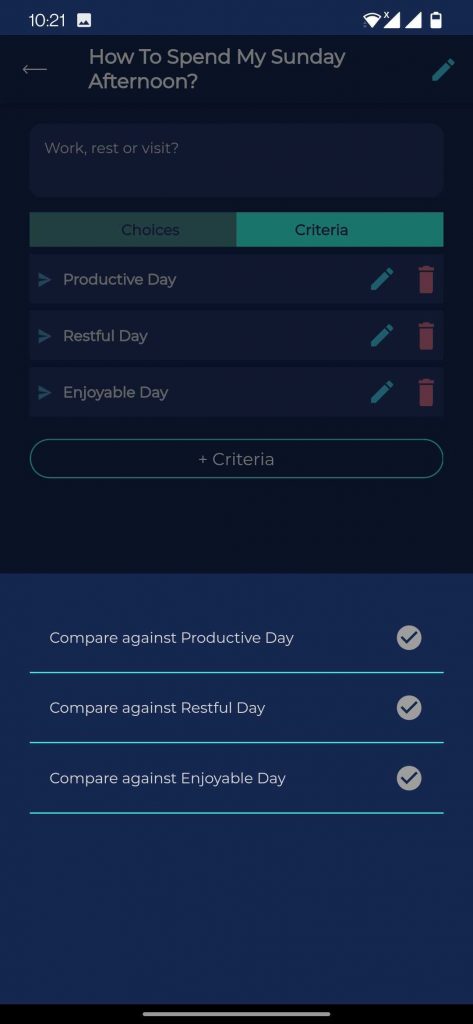
Choice Comparison
When you tap the “Choice Comparison” button, you can see three options appear.
- Compare against Productive Day
- Compare against Restful Day
- Compare against Enjoyable Day
So, basically we need to do 3 Pair-wise Comparisons since we have 3 different criterion in this decision problem.
Perform Choice comparisons for each of the 3 criterion.
For example, for the case of “Productive Day” criterion, which Choice has higher value?
Similarly, for the case of “Restful Day”, we perform the comparisons as before.
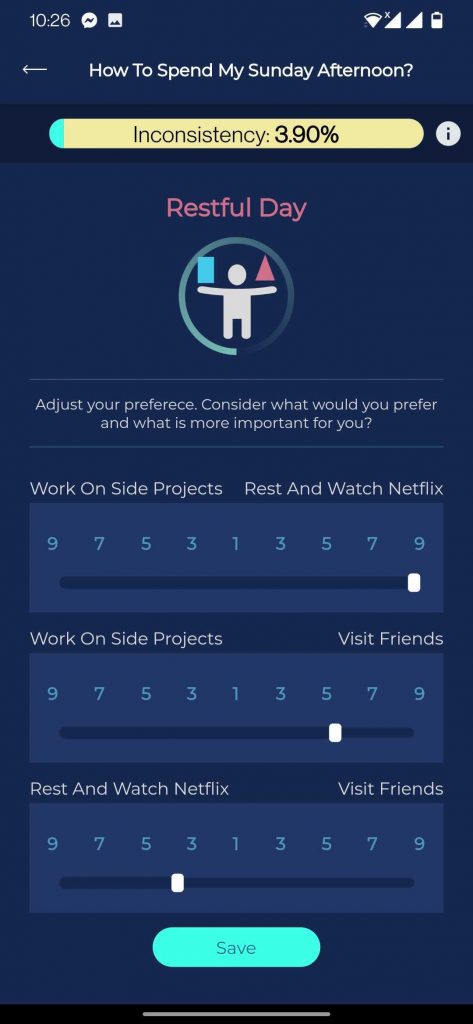
Once we have performed Choice Comparison for all the Criteria, it’s time to view the results!
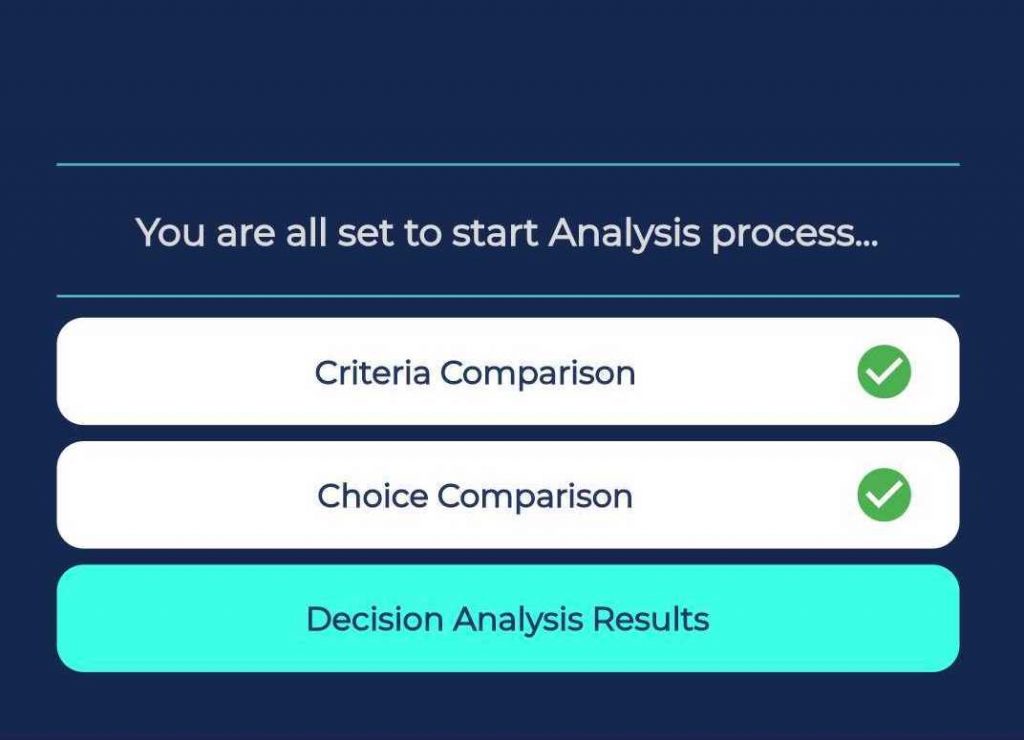
Decision Analysis Results View
To view the results, we tap the “Decision Analysis Results” which becomes activated after both the Criteria and Choice comparison have been performed.
From the results screen, we can visualize our Decision problem and the prioritization of the available Choices.
In this example, we can see that the Best Choice for the Decision Maker is to “Work On Side Projects“. This result was calculated based on the pair-wise comparisons done on the previous steps.
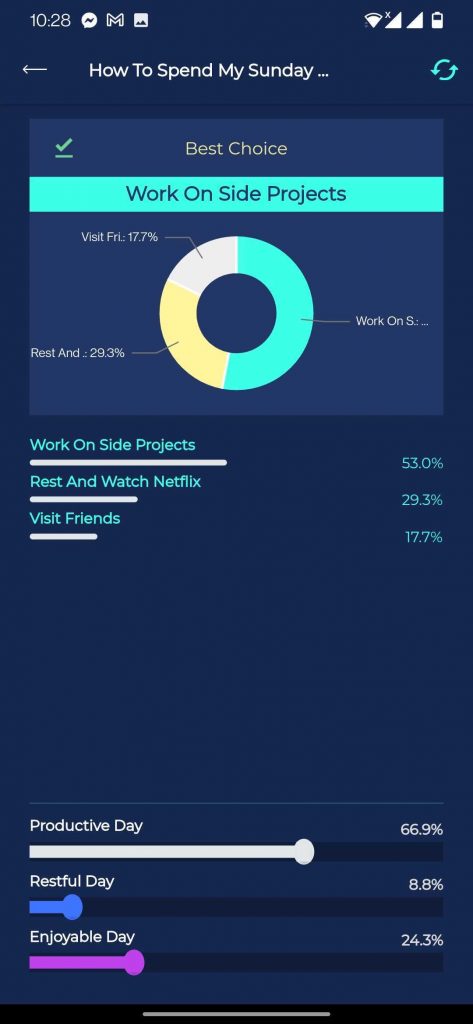
Besides, viewing the Best Choice, we can also adjust the values of Criteria to see how sensitive any criterion is using the Sensitivity Analysis feature.
Conclusion
In this post, we demonstrated how one can use Decision Mentor to perform personal Decisions like “How To Spend My Sunday Afternoon”. This was only a basic example of what one can do with the Decision Mentor mobile app. We can also perform complex decisions which include more choices and criteria and visualize the Best Choices for any given scenario.
The Decision Mentor app is available in both Google Play and Apple Store as a free mobile app!